Epoxy floors are incredibly durable, but they aren't invincible. After five or ten years of forklift traffic, even the best system will look scratched, dull, and tired.
The good news? You don't need to rip it up and start from scratch. You can simply recoat it.
The bad news? You cannot just paint over glossy epoxy.
If you apply a fresh layer of Epoxy Floor Paint directly over an old, shiny coating, it will delaminate. Old epoxy is like glass - it is too smooth and hard for new resin to grab onto. To make the new stick to the old, you need to create an abrasive finish to allow the new coat to bond effectively.
Here is the professional workflow for refreshing an existing floor without causing a failure.
Step 1: The Compatibility Test (Do Not Skip)
Before you buy any paint, you must know what is currently on your floor. If you apply a heavy-duty, solvent-based epoxy over a cheap, single-pack acrylic floor paint, the solvents in the new paint will "attack" the old layer. It will bubble, wrinkle, and lift (a reaction called "pickling").
If you’re not sure what type of paint or coating is currently down, don't guess. If you don’t remember, or a previous owner applied the coating, it's not the end of the world. There is a simple test you can perform to figure this out.
The Solvent Rub Test:
-
Soak a rag in standard thinners or Xylene.
-
Rub a small patch of the existing floor vigorously for 60 seconds.
-
Check: Does the old paint soften, dissolve, or rub off onto the rag?
-
YES: It is a weaker single-pack waterbased paint. You generally cannot overcoat this with a 2-part epoxy. You must stick to a single-pack Acrylic Waterbased Paint [INSERT LINK] or strip it off.
-
NO: It is likely a chemically cured epoxy or PU. You are safe to overcoat it with a similar 2-pack system.
Step 2: Clean and Degrease
You cannot sand a dirty floor. If you try to sand a greasy floor, you will just drive the grease into the scratches you are creating. Scrub the entire area with a heavy-duty Industrial Degreaser and rinse it thoroughly. The floor must be clinically clean.
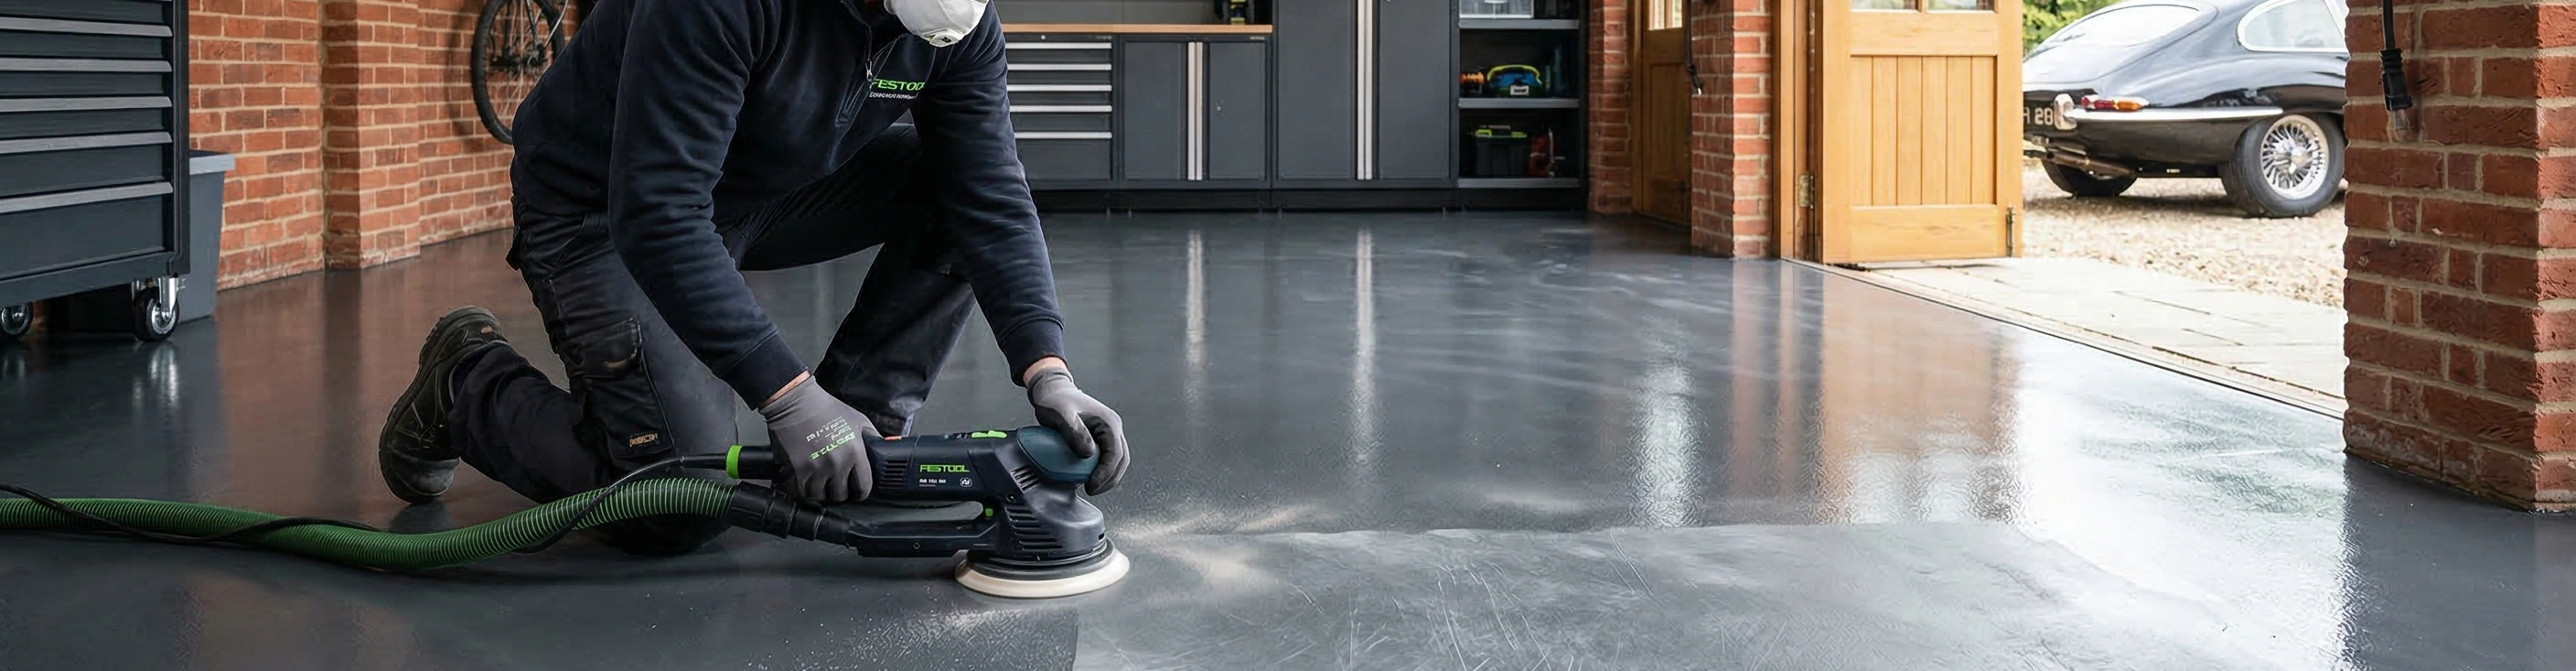
Step 3: The "Mechanical Key" (Sanding)
This is the secret to recoating epoxy floors. Since the chemical bond of the old floor has long since cured, you must rely on a mechanical bond. You need to scratch the surface to give the new paint something to lock into.
-
The Goal: You are not trying to remove the old paint. You are just trying to remove the gloss.
-
The Method: Use a floor buffer with a sanding screen (120 grit) or an orbital sander for smaller areas.
-
The Result: When you are finished, the floor should look dull, matt, and white/dusty. If you can still see your reflection in any spot, the new paint will peel off that spot. Sand it again.
Step 4: Solvent Wipe
Once you have vacuumed up the dust, wipe the floor down with a solvent-dampened mop (using an appropriate thinner). This does two things:
-
It picks up the microscopic dust that the vacuum missed.
-
It slightly "softens" the surface of the old resin, making it tacky and receptive to the new coat.
Step 5: Application
The beauty of recoating is that you generally do not need a primer. The old coating acts as the sealer. Simply apply your fresh High Build Epoxy Factory Floor Paint or Industrial Concrete Floor Paint directly onto the abraded surface.
Conclusion
Refurbishing an existing floor is 50% cheaper than installing a new one, but only if the prep is right.
If you skip the sanding, you are gambling. But if you clean it, dull it, and check compatibility, a recoat can make a 10-year-old floor look brand new for a fraction of the price.
Share:
Painting New Concrete: How Long You Have to Wait
When and How to Acid Etch Concrete Safely